radio when you're on the move? A solar charging kit is a great option
as components have gotten smaller, lighter and cheaper. You can buy
kits like the Goal Zero Guide 10 solar panel which comes with everything
you need to keep AA and AAA batteries charged, or you can build your own
system to meet your specific needs, we'll look at both options so you
get an idea of some different options.
Let's look at 3 components of mobile solar charging:
Collection.
Storage.
Distribution.
Store bought ready to go:
We'll start out with the Goal Zero Guide 10 solar kit which retails forabout $100.00. It comes with the Nomad 7 solar panel, a rechargeable
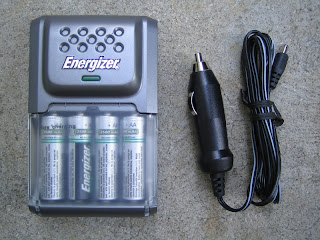
battery pack that holds 4 AA or AAA batteries. 4 AAA batteries are
included and you can purchase additional batteries separately. Also
included are a 12v DC adapter and a few other cables.
Here are both sides of the kit, there are 2 panels which fold to close
like a book, and zipper together.


We have the panel for collection.
The rechargeable battery pack fills the role of storage.
The rechargeable battery pack is also used for distribution.
One note about this kit, the battery pack can be recharged via the solar
panel, A/C or DC power, so there is some overlap on a few of these
concepts.
This is the power connector block which is connected to the panel.


There are a quite a few different ways to use this kit, one is by using
the solar panel to charge a battery pack of AA or AAA rechargeable
batteries. This connection is made with the included (unfortunately)
proprietary cable. You can also recharge the battery pack via A/C
using, unfortunately, a USB mini cable, not a standard micro USB cable.


Once you charge your rechargeable battery pack, you can do 2 things,
take the batteries out of the battery pack and place them into a device,
or connect a USB cable to the battery pack and charge things directly
from the battery pack, like a cellphone.

You can also use the 12 volt auto adapter cable, plugged directly into
the power block on the panel, to power/charge 12 volt devices. This
setup skips the storage role as it is only powering devices.


You can also plug a USB cable directly into the power block on the
panel, and charge any USB devices. This setup skips the storage role as
it is only powering devices.
There's an example of an available product that fills all the roles of
mobile solar charging, the kit including batteries weighs .4 lbs.
Self Built Kit
Let's see one made from individual parts and pieces, it consists of a solar panel, a solar charge controller, a 12
volt auto adapter and all the necessary cables.
For collection, we have a Powerfilm Solar brand rollable solar panel,
model R15-600.
Specifications:
Rated Power (Pmax): 10 Watts
Operating Voltage (Vmp): 15.4 Volts
Operating Current (Imp): 0.6 Amps
Weight: 1.0 lb
Dimensions: 11.5" x 4.25" x 4.25" (Rolled), 11.5" x 38" (Unrolled)
You roll it up and keep it closed with a velcro strap, it's light,
waterproof, and very packable.


This setup skips storage, but can send power to any battery pack, like
the one from the Goal Zero, for storage if desired.
Distribution is handled by the solar charge controller.
This is a Powermate Technology model PSC-A15. solar charge controller.
It takes the input from a solar panel and regulates the output voltage.
Specifications:
Charge Load Current: 15A
Automatic Charge Voltage: 12VDC/24VDC
Maximum Charging Voltage: 14.7V for 12V systems, 29.4V for 24V
systems
Maximum Discharge Voltage: 10.5V for 12V systems, 21V for 24V
systems
Maximum Solar Panel Power: 180W @ 18V for 12V systems, 360W @ 36V
for 24V systems
2 selectable modes
LED mode indicator and audible alarm for warnings
Recommended wiring: 8-10 AWG
Aluminum heat sink
Size: 5.51" x 3.54" x 1.42"
Weight: 210 grams (7.4 oz.)

There are a few different way to connect things up. The solar panel has
a connector on it that can accept different cable attachments, one of
which has the solar panel connector on one end, and bare wires on the
other end.

If you look on the top of the solar charge controller, you will see 2
connector holes on the left hand side at the bottom, with a small icon
for a solar panel. Those connectors accept the the solar panels bare
wire output leads.
There are 2 other sets of connector holes on the solar charge
controller, the middle one has a battery icon. This connection provides
output voltage and can connect directly to a car battery for example.
This will allow you to keep a car battery charged or even recharge it
over time, directly from the sun. Part of what a solar charge
controller does is provide overcharge and reverse charge protection.
Once a battery is fully charged, the solar charge controller will stop
any current from backing up from the fully charged battery, back into
the panel and destroying it.
One of the other connectors that plugs into the solar panel connector is
a female auto socket adapter. That will allow me to plug in a 12 volt
auto to USB adapter and charge or run devices directly from the solar
panel.


The voltage coming from the solar panel when it's placed in direct
sunlight is around 15.5 volts. The 12 volt auto to USB adapter I'm using
has built-in voltage limiting, so it will lower the 15.5 volts from the
solar panel to 5.5 volts for USB automatically, and not damage my
devices. I like this adapter because it can also plug into A/C by
flipping down the prongs.
Since the solar panel is only rated for .6 amps, I will add a second
solar panel in parallel to this system. My rechargeable battery pack
draws 1 amp when charging 4 batteries simultaneously. With both panels
connected I can charge my batteries with the 12 volt auto connector from
my rechargeable battery pack.
The panel and all of its accessories roll up and store inside of a 4"
diameter pvc pipe. I bought the 4" pvc pipe, one solid end cap, one
internally threaded end cap and one threaded screw end cap.


Hopefully you got some worthwhile information from this article, feel
free to post questions/comments.
volt auto adapter and all the necessary cables.
For collection, we have a Powerfilm Solar brand rollable solar panel,
model R15-600.
Specifications:
Rated Power (Pmax): 10 Watts
Operating Voltage (Vmp): 15.4 Volts
Operating Current (Imp): 0.6 Amps
Weight: 1.0 lb
Dimensions: 11.5" x 4.25" x 4.25" (Rolled), 11.5" x 38" (Unrolled)
You roll it up and keep it closed with a velcro strap, it's light,
waterproof, and very packable.


This setup skips storage, but can send power to any battery pack, like
the one from the Goal Zero, for storage if desired.
Distribution is handled by the solar charge controller.
This is a Powermate Technology model PSC-A15. solar charge controller.
It takes the input from a solar panel and regulates the output voltage.
Specifications:
Charge Load Current: 15A
Automatic Charge Voltage: 12VDC/24VDC
Maximum Charging Voltage: 14.7V for 12V systems, 29.4V for 24V
systems
Maximum Discharge Voltage: 10.5V for 12V systems, 21V for 24V
systems
Maximum Solar Panel Power: 180W @ 18V for 12V systems, 360W @ 36V
for 24V systems
2 selectable modes
LED mode indicator and audible alarm for warnings
Recommended wiring: 8-10 AWG
Aluminum heat sink
Size: 5.51" x 3.54" x 1.42"
Weight: 210 grams (7.4 oz.)

There are a few different way to connect things up. The solar panel has
a connector on it that can accept different cable attachments, one of
which has the solar panel connector on one end, and bare wires on the
other end.

If you look on the top of the solar charge controller, you will see 2
connector holes on the left hand side at the bottom, with a small icon
for a solar panel. Those connectors accept the the solar panels bare
wire output leads.
There are 2 other sets of connector holes on the solar charge
controller, the middle one has a battery icon. This connection provides
output voltage and can connect directly to a car battery for example.
This will allow you to keep a car battery charged or even recharge it
over time, directly from the sun. Part of what a solar charge
controller does is provide overcharge and reverse charge protection.
Once a battery is fully charged, the solar charge controller will stop
any current from backing up from the fully charged battery, back into
the panel and destroying it.
One of the other connectors that plugs into the solar panel connector is
a female auto socket adapter. That will allow me to plug in a 12 volt
auto to USB adapter and charge or run devices directly from the solar
panel.


The voltage coming from the solar panel when it's placed in direct
sunlight is around 15.5 volts. The 12 volt auto to USB adapter I'm using
has built-in voltage limiting, so it will lower the 15.5 volts from the
solar panel to 5.5 volts for USB automatically, and not damage my
devices. I like this adapter because it can also plug into A/C by
flipping down the prongs.
Since the solar panel is only rated for .6 amps, I will add a second
solar panel in parallel to this system. My rechargeable battery pack
draws 1 amp when charging 4 batteries simultaneously. With both panels
connected I can charge my batteries with the 12 volt auto connector from
my rechargeable battery pack.

The panel and all of its accessories roll up and store inside of a 4"
diameter pvc pipe. I bought the 4" pvc pipe, one solid end cap, one
internally threaded end cap and one threaded screw end cap.


Hopefully you got some worthwhile information from this article, feel
free to post questions/comments.
No comments:
Post a Comment